Managing Agile Teams
Agile Teams are the fundamental building blocks of value delivery in Safedevops.app. The Teams Management page provides a centralized location to create, view, and manage your organization's teams and their memberships. Teams are organized under Agile Release Trains (ARTs) and consist of team members with specific SAFe® roles.
Required Permissions: You must have the can_manage_teams permission to create, edit, or delete teams and manage their members. This permission is typically assigned to roles like RTE (Release Train Engineer) or OrgAdmin.
To learn more about permissions, see the Managing Role Permissions guide.
The Teams Interface
The main teams page displays all teams in an organized grid layout with expandable cards. Each team card shows essential information including team size, assigned ART, and quick access to team details.
1. Navigating the Teams View
The teams interface provides several tools for efficient team management:
- Team Cards: Each team is displayed as a card showing the team name, member count, and assigned ART.
- Expandable Details: Click any team card to reveal detailed member information and role assignments.
- Create Team Button: Located in the top-right corner for adding new teams to your organization.
[Screenshot of the main teams grid view with multiple team cards displayed.]
2. Filtering and Searching Teams
Use the comprehensive filter bar at the top to quickly locate specific teams:
- Filter by ART: Select an Agile Release Train from the dropdown to view only teams assigned to that ART.
- Smart Search: Type in the search box to find teams by name, description, or team member names.
- Real-time Filtering: Results update instantly as you type or change filter selections.
[Screenshot showing the filter bar with ART dropdown and search functionality.]
3. Viewing Team Details
Expand any team card to access comprehensive team information:
- Team Description: View the team's purpose and responsibilities.
- Member List: See all team members with their assigned SAFe® roles (Scrum Master, Product Owner, Developer, etc.).
- ART Assignment: Confirm which Agile Release Train the team belongs to.
- Quick Actions: Access edit and manage options directly from the expanded view.
[Screenshot of an expanded team card showing member details and role assignments.]
Creating a New Team
Setting up new Agile Teams is essential for scaling your organization. Teams should be cross-functional and capable of delivering end-to-end value within your Agile Release Train.
1. Initiating Team Creation
Start the team creation process from the main teams page:
- Create Team Button: Click the prominent "Create Team" button in the top-right corner.
- Permission Check: Ensure you have the necessary can_manage_teams permission.
- Modal Dialog: The creation form opens in a focused modal dialog.
[Screenshot showing the Create Team button and the opening of the creation modal.]
2. Configuring Team Details
Complete the team creation form with the following essential information:
- Team Name: Choose a clear, descriptive name that reflects the team's purpose (Required).
- Description: Provide context about the team's responsibilities and scope (Recommended).
- Agile Release Train (ART): Select the ART this team will belong to (Required).
- Team Type: Specify if this is a development team, system team, or other specialized team type.
Best Practice: Team names should be meaningful to your organization and easy to identify. Consider including the product or service area the team focuses on.
[Screenshot of the Create New Team modal with all form fields visible.]
3. Saving and Next Steps
Complete the team creation process:
- Validation: Ensure all required fields are completed and valid.
- Save Team: Click "Create Team" to save the new team to your organization.
- Immediate Access: The new team card appears immediately in your teams grid.
- Member Assignment: You can now proceed to add team members and assign roles.
Managing Team Membership
Effective team composition is crucial for Agile success. Teams should be stable, cross-functional, and include all necessary SAFe® roles for autonomous value delivery.
1. Adding Team Members
Expand the team card to access member management features:
- Add Members Button: Click to open the member selection interface.
- User Selection: Choose from existing organization members.
- Role Assignment: Assign appropriate SAFe® roles (Scrum Master, Product Owner, Developer, Tester, etc.).
- Multiple Additions: Add several members at once for efficiency.
[Screenshot showing the team member addition interface with role assignment options.]
2. Managing Existing Members
Modify team composition and role assignments as needed:
- Role Updates: Change a member's SAFe® role by clicking the edit icon next to their name.
- Member Removal: Remove team members who are transitioning to other teams or leaving.
- Capacity Planning: Ensure optimal team size (typically 5-11 members) for effective collaboration.
- Cross-functional Balance: Verify the team has all necessary skills for end-to-end delivery.
Important: Changes to team membership may affect ongoing work assignments and iteration planning. Coordinate changes with your Release Train Engineer (RTE) and Product Management.
Team Management Best Practices
Following SAFe® principles for team management ensures optimal performance and value delivery across your Agile Release Train.
Essential SAFe® Team Composition
Structure your teams according to SAFe® guidelines:
- Optimal Size: Maintain teams of 5-11 members for effective communication and collaboration.
- Cross-functional Skills: Include all skills necessary to deliver features from concept to deployment.
- Stable Membership: Minimize team changes to build trust and improve performance over time.
- Dedicated Members: Ensure team members are not over-allocated across multiple teams.
- SAFe® Roles: Include essential roles like Scrum Master and Product Owner for each team.
Monitoring Team Health
Use the teams interface to maintain oversight of team effectiveness:
- Regular Reviews: Periodically review team composition and role assignments.
- Capacity Monitoring: Ensure teams are appropriately sized for their workload.
- Skill Gap Analysis: Identify and address missing skills within teams.
- Performance Tracking: Monitor team metrics and adjust membership as needed.
Managing an Existing Team
Once a team is created, you can modify its details, manage its members, or delete it.
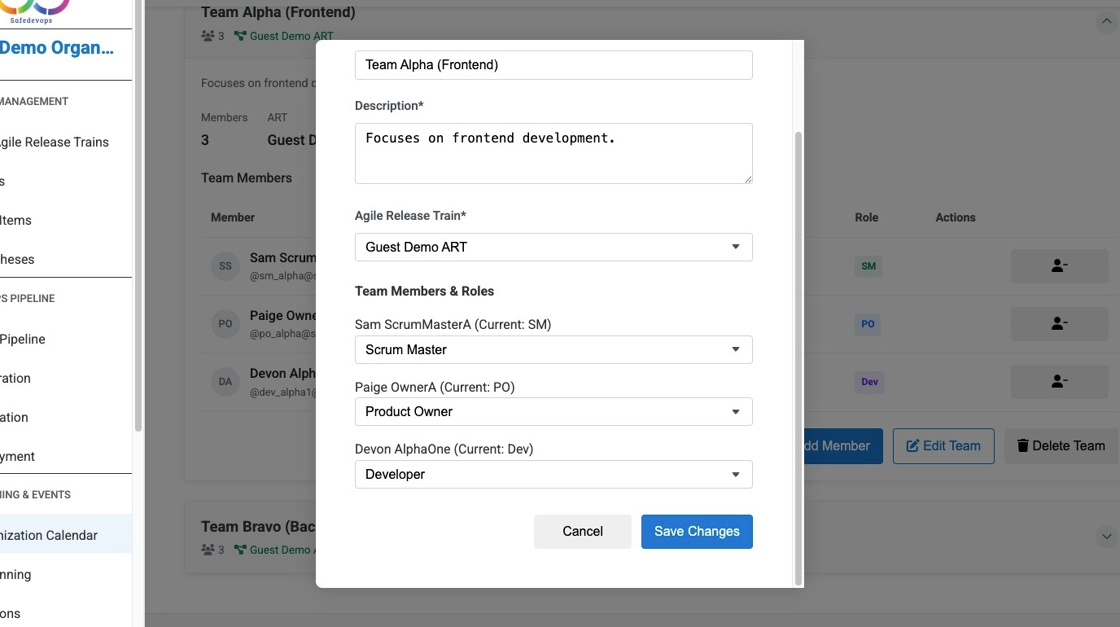
Editing Team Details and Member Roles
Expand the team card and click the "Edit Team" button. In the modal, you can update the team's name, description, and ART assignment. You can also change the roles of existing members directly from this screen.
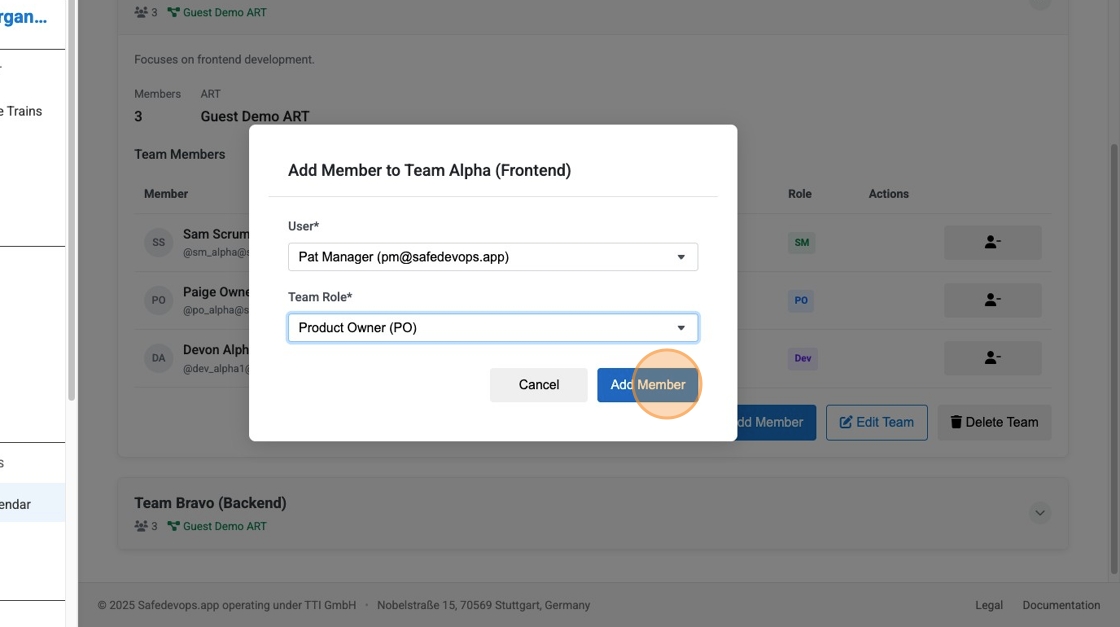
Adding a Member
To add a new person to the team, expand the card and click "Add Member". Select a user from the list, assign them a team-specific role (e.g., Scrum Master, Developer), and click "Add Member" to confirm.
Removing a Member
In the expanded team card, find the member you wish to remove in the members list and click the red trash icon next to their name. A confirmation dialog will appear to prevent accidental removal.
Deleting a Team
To permanently delete a team, expand its card and click the "Delete Team" button. You will be asked to confirm this action as it cannot be undone.